Shipping Estimate
USA
- USA
- CAN
- USA
- CAN
Ships within 48 hours · Estimated delivery Jul 6 - Jul 11
For Your Every Summer RSVP, with Code: SUMMER15
Description
late summer flower seeds Late Winter Flower Seed Collection – Kids Seed CoPlant flower seeds this winter! There are many flower varieties that can be sown in the garden in winter. Some varieties benefit from cold stratification, a period of cold moist conditions, and some varieties will produce early spring blooms after overwintering. We put together this collection of 9 of our favorite flower varieties that can be sown in your garden in winter. While all of these varieties will overwinter in your gardens, they can also be
Plant flower seeds this winter! There are many flower varieties that can be sown in the garden in winter. Some varieties benefit from cold-stratification, a period of cold moist conditions, and some varieties will produce early spring blooms after overwintering.
We put together this collection of 9 of our favorite flower varieties that can be sown in your garden in winter. While all of these varieties will overwinter in your gardens, they can also be sown in early spring, several weeks before your last frost.
Seed Varieties:
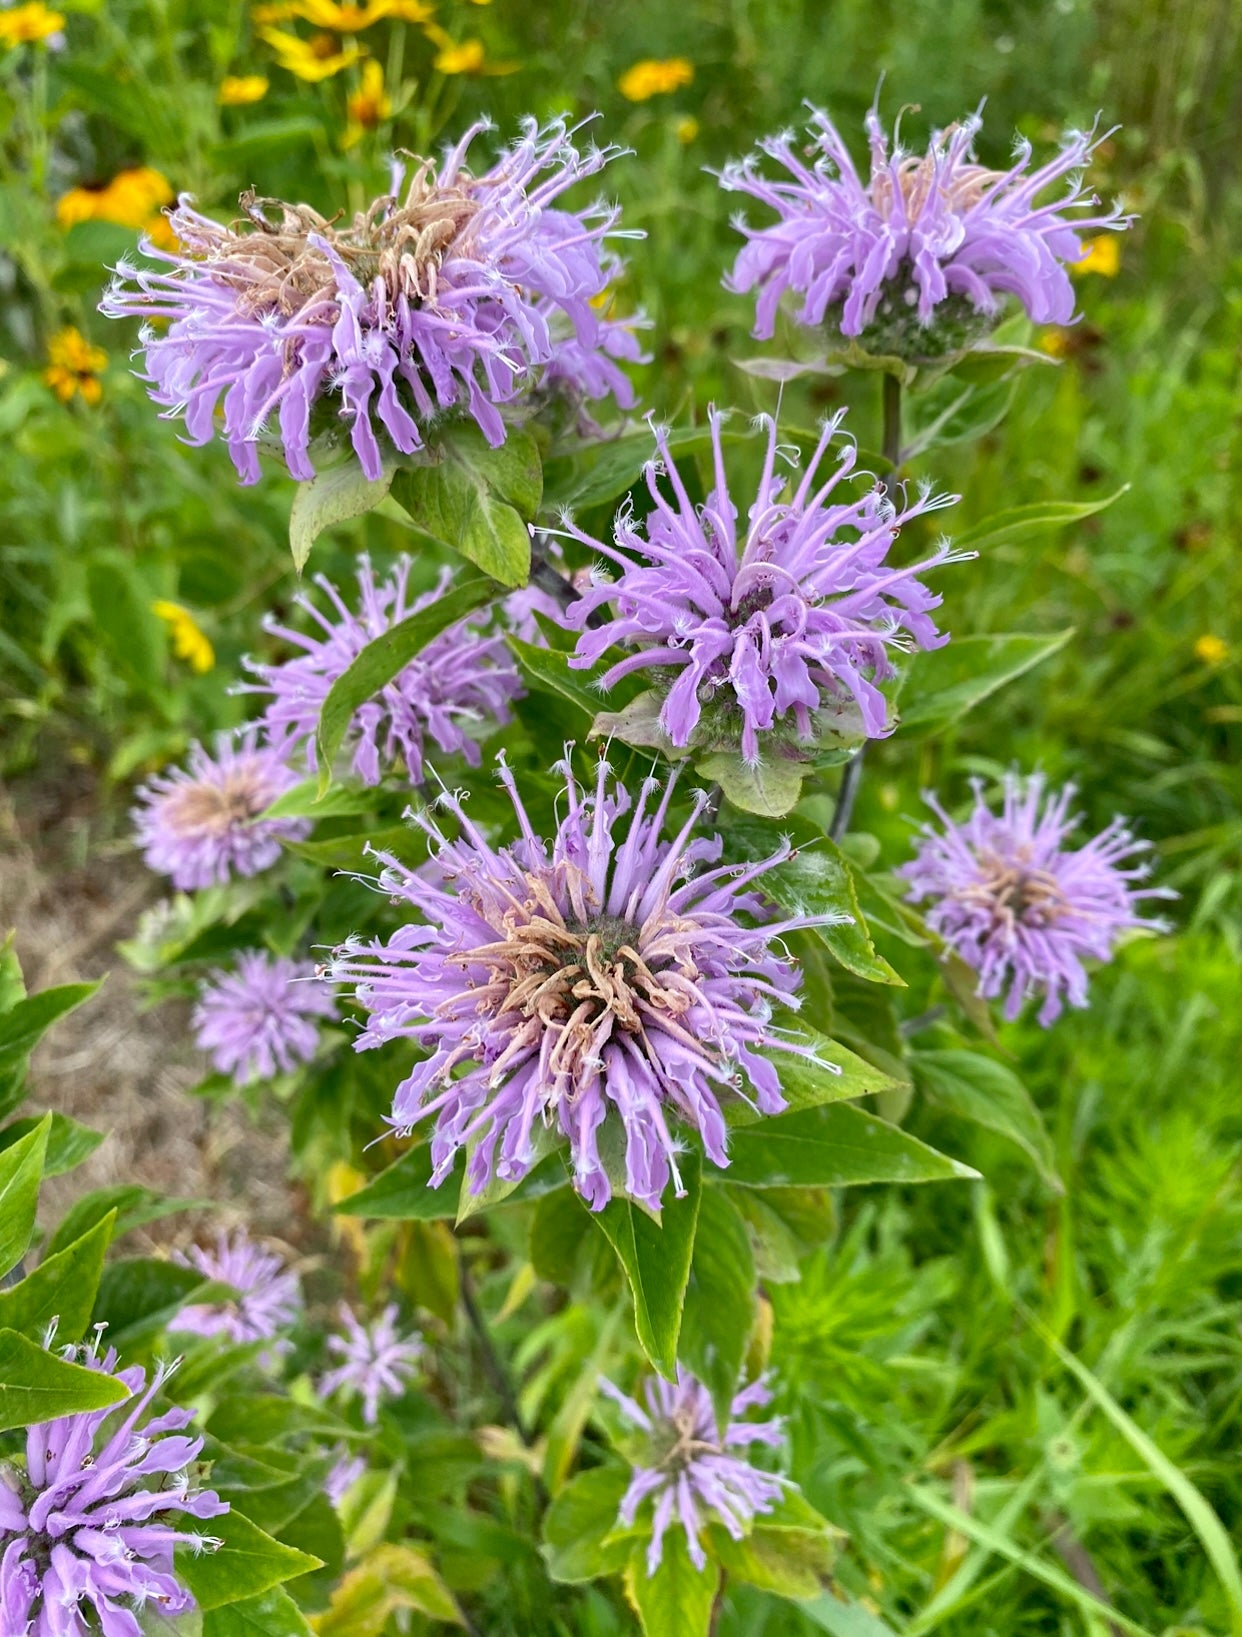
Wild Bergamot (Monarda fistulosa)
An herbaceous perennial plant native to much of North America with beautiful light purple blooms. Wild bergamot honey is prized for its' herby-sweet flavor and the flowers attract lots of beneficial insects to the garden. Native American used the plant as a medicinal remedy and generally infused the aromatic leaves in tea. (As always, consult your medical provider for advise on herbal remedies!) Wild bergamot spreads through underground rhizomes and it looks beautiful in mass plantings. We love wild bergamot as a cut-flower in arrangements.
Origin: We collected the parent seed of our Wild Bergamot from wild plants on a trail near Watch Knob Mountain in Swannanoa, NC many years ago.
(Approximately 50 seeds per packet)
Planting Instructions: Sow a few seeds in a 4 inch pot indoors in mid-winter, barely covering them with soil. Transplant outside in the spring or summer, 6-8 weeks after starting the seeds, spacing plants 12-18" apart in full sun to part shade. Seeds can also be sown directly in the garden 6-8 weeks before your last frost in spring or in the fall a few weeks after your first frost.
Milkweed (Asclepias tuberosa)
Perhaps the single most important thing home gardeners can do to support monarch butterfly populations is to plant perennial milkweed. This native heirloom plant provides food and habitat for monarch butterflies and the plant is an essential food source for monarch caterpillars. In summer, deep orange blooms look beautiful in the garden and provide a wonderful source of nectar for a range of beneficial insects.
Butterfly milkweed has smaller leaves than common or swamp milkweed and the flowers are a dark shade of orange. The plants generally grow to approximately 24" tall. Butterfly milkweed is a perennial plant and spreads through underground rhizomes as well as through scattered seeds. We grow our milkweed in border and peripheral areas of the garden where the plants have room to spread into a monarch nursery.
NOTE: Sap is mildly toxic; avoid eye/skin contact and do not ingest.
Origin: We harvested the parent seed of our milkweed from the Beaver Lake Bird Sanctuary in Asheville, NC.
(Approximately 30 seeds per packet)
Planting Instructions: Seeds germinate best when COLD STRATIFIED. Simply place seeds on a damp paper towel in a plastic bag in the refrigerator for about 30 days before sowing seeds in the garden or starting in containers to transplant in spring. Seeds can also be sown in the garden in fall where cold stratification will occur naturally in winter. Sow seeds or transplant seedlings in full sun and keep well watered until established. Milkweed may not bloom in the first year but will perennialize and bloom in the second year and for years to come.
Bachelor Button (Centaurea cyanus)
With amazing sky-blue color, bachelor buttons look stunning in mass plantings. They are easy-to-grow, drought tolerant and edible petals add a fun garnish to salads! Bachelor buttons appear in many European folk tales and men of olden days would frequently wear a bloom on their lapel.
Origin: We collected the parent seed of the colorful bachelor button mix from two sources. First, from a wheat field in Hungary while visiting family there and second from the garden of a friend in Asheville, NC who has saved her seeds for over thirty years. The true blue blooms are of Hungarian origin and the other colors were carefully selected over the years in Asheville.
(Approximately 100 seeds per packet)
Planting Instructions: sow a group of 3 seeds 1/4" deep every 8" in spring as soon as soil can be worked. Full sun. 24"-36" height. Seeds can also be sown in fall a few weeks after your first frost.
Cleome (Cleome hassleriana)
With big dramatic flowers in shades of pink, purple and white, cleome are a wonderful addition to the cut-flower garden. The plants generally grow to about 4-5 ft tall and they attract all sorts of pollinators, especially hummingbirds! Cleome make wonderfully fragrant cut flowers and the spiky seed pods add a unique look to the garden. Cleome like to grow in full sun but once they're established they need very little care.
Origin: The parent seed of our Cleome came from the Tuileries Garden, located between the Louvre and the Place de la Concorde in the 1st arrondissement of Paris, France. Many years ago we knew a gardener at Tuileries and she gave us Cleome seeds from their collection.
(Approximately 50 seeds per packet)
Planting Instructions: Sow cleome seeds by scattering the seeds on prepared soil in full sun. The seeds germinate best with light. You can either sow the seeds in the fall and they'll emerge when conditions are right in spring, or, you can sow seeds a few weeks before your last frost date in spring. Seeds can take 10-15 days to germinate.
Nigella (Nigella damascena)
Nigella is an airy plant and lively blooms range in color from red, blue, violet and white. This early bloomer self sows easily. Nigella makes a great cut-flower and dried seed pods have a unique look in dried arrangements. Also known as Love-in-a-Mist, this hearty and easy-to-grow plant will become an instant favorite and garden mainstay.
Origin: We were given the parent seed of our nigella by a friend who volunteers at community garden in Tokyo, Japan while we were on a trip to visit family there.
(Approximately 50 seeds per packet)
Planting Instructions: sow a group of 3 seeds every 8" by barely covering with soil a few weeks before your last frost in spring. Full sun. Thin to 1 every 8" when plants are 3" tall. Seeds can also be sown in fall a few weeks after your first frost.
Lupine (Lupinus polyphyllus)
Lupines are perennial flowers with huge, stately blooms. Mid-winter sown lupines might not bloom until their second year in cool climates (Zone 4-7) and in warm climates (Zone 7 & Up) fall planting generally produces blooms in early spring. Mostly Pink and Purple blooms.
The wonderful book "Ms. Rumphius" by Barbara Cooney inspired us to grow lupines and the blooms are a reminder to work to add beauty to the world. 36"- 48" tall plants.
Origin: The parent seed of our lupines we given to us by a dear friend who has a gorgeous farm near Eugene, Oregon.
(Approximately 50 seeds per packet)
Planting Instructions: Sow 1 seed 1/8" deep every 12" in late fall or early winter in full sun. (May not bloom until year 2 in cooler climates)
Echinacea (Echinacea purpurea)
A gorgeous wildflower native to North America, echinacea is a popular perennial in many gardens and makes a wonderful cut-flower and attractor of pollinators. The plants have many herbal uses and the flowers grow on long stems to about 5 feet tall. The blooms of our echinacea variety are generally purple and range in hues from lighter to darker purple.
The genus name Echinacea comes from the Greek work for hedgehog, referring to the spiny seed heads of the flower. Native Americans used the plant extensively for a wide range of wellness applications for the antibiotic properties of the plant and immune boosting attributes. German physician Dr. Gerhard Madaus thoroughly researched the plant in the early 20th century and his work led to increased adoption of echinacea in naturopathic applications.
Note: Echinacea is a perennial plant so it will grow anew from established roots every year. The plants generally don't bloom until their second year but will bloom each year after.
Origin: The parent seed of our echinacea came from two sources, both from wildcrafted seeds. First, we save seeds from wild plants near the NC Arboretum in Bent Creek, NC and also from seeds we saved from wild plants near Cacapon State Park near Berkley Springs, WV.
(Approximately 50 Seeds per packet)
Planting Instructions: Echinacea seeds benefit from cold-stratification, a period of cold, moist conditions. We recommend planting seeds either in the fall after your first frost or in late winter several weeks before your last frost. Seeds can be manually cold stratified too by placing seeds on a damp paper towel in a plastic bag. Keep the bag in the refrigerator for at least 30 days before planting. Sow seeds 1/4" deep in full sun to part shade in well drained soil. Keep seeds moist until they germinate.
Flanders Poppi ( Papaveri rhoeas )
PoppI (Papaveri spp.)
Poppies are such a joyful bloom to have in the garden and they are some of the first flowers to bloom in early spring. Our mix has vibrant blooms that are red, pink, purple and white and some interesting combinations have developed in our garden over the years. Plants grow about 4-6ft tall.
Origin: We collected the parent seed of this poppi mix on the farm of our cousin in Hungary many years ago.
(Approximately 200 seeds per packet)
Planting Instructions: In most climates, except the coldest zones, seeds are best sown onto prepared soil by scattering in the fall after the first frost. They can also be sown in the same way in late winter about 4 weeks before the last frost. Sow in full sun.
We hope you enjoy growing these flowers!
Shipping Notes
- Free Standard Shipping on $100+ Orders to the USA.
- Except Preorder products are shipped in 48 hours.
- Delivery to the USA:
- Standard Shipping : 3-10 business days
- If time is of the essence, please consider selecting expedited delivery for faster service.
Exchange/Return Notes
- We offer a 30-day return/exchange service after receiving.
- Final sale items are not eligible for returns or exchanges.
- To process your return/exchange, please contact us at [email protected]
- Please click here for more details>>> Return & Exchange Policy