ex gear AEM D16Y8 Tru-Time Adjustable Cam Gear for 96-00 Civic EX · Hybrid Racing
SKU: 919349428
ex gear

ex gear AEM D16Y8 Tru-Time Adjustable Cam Gear for 96-00 Civic EX · Hybrid Racing

Sale price$25.46 Regular price$28.29
Save 10%

Shipping Estimate
USA
  • USA
  • CAN

Ships within 48 hours · Estimated delivery Jul 7 - Jul 12

Promo Codes Available:

For Your Every Summer RSVP, with Code: SUMMER15

Description

ex gear AEM D16Y8 Tru-Time Adjustable Cam Gear for 96-00 Civic EX · Hybrid RacingCompatible with D16Y8 Engines Fits 96 00 Civic EX and 96 97 Del Sol Si Adjustable Cam Gear for Precise Timing Changes Easily Readable Laser Etched Markings Description Vehicle Fitment Technical Data Included Install Guide AEM Tru Time Adjustable Cam Gear, D16Y8 Engines If youve ever bolted a cam into a D16Y8 and thought, why does this thing feel a little off, you already get why an adjustable gear matters. The AEM Tru Time adjustable cam gear (SKU:

  • Compatible with D16Y8 Engines
  • Fits 96-00 Civic EX and 96-97 Del Sol Si
  • Adjustable Cam Gear for Precise Timing Changes
  • Easily Readable Laser Etched Markings
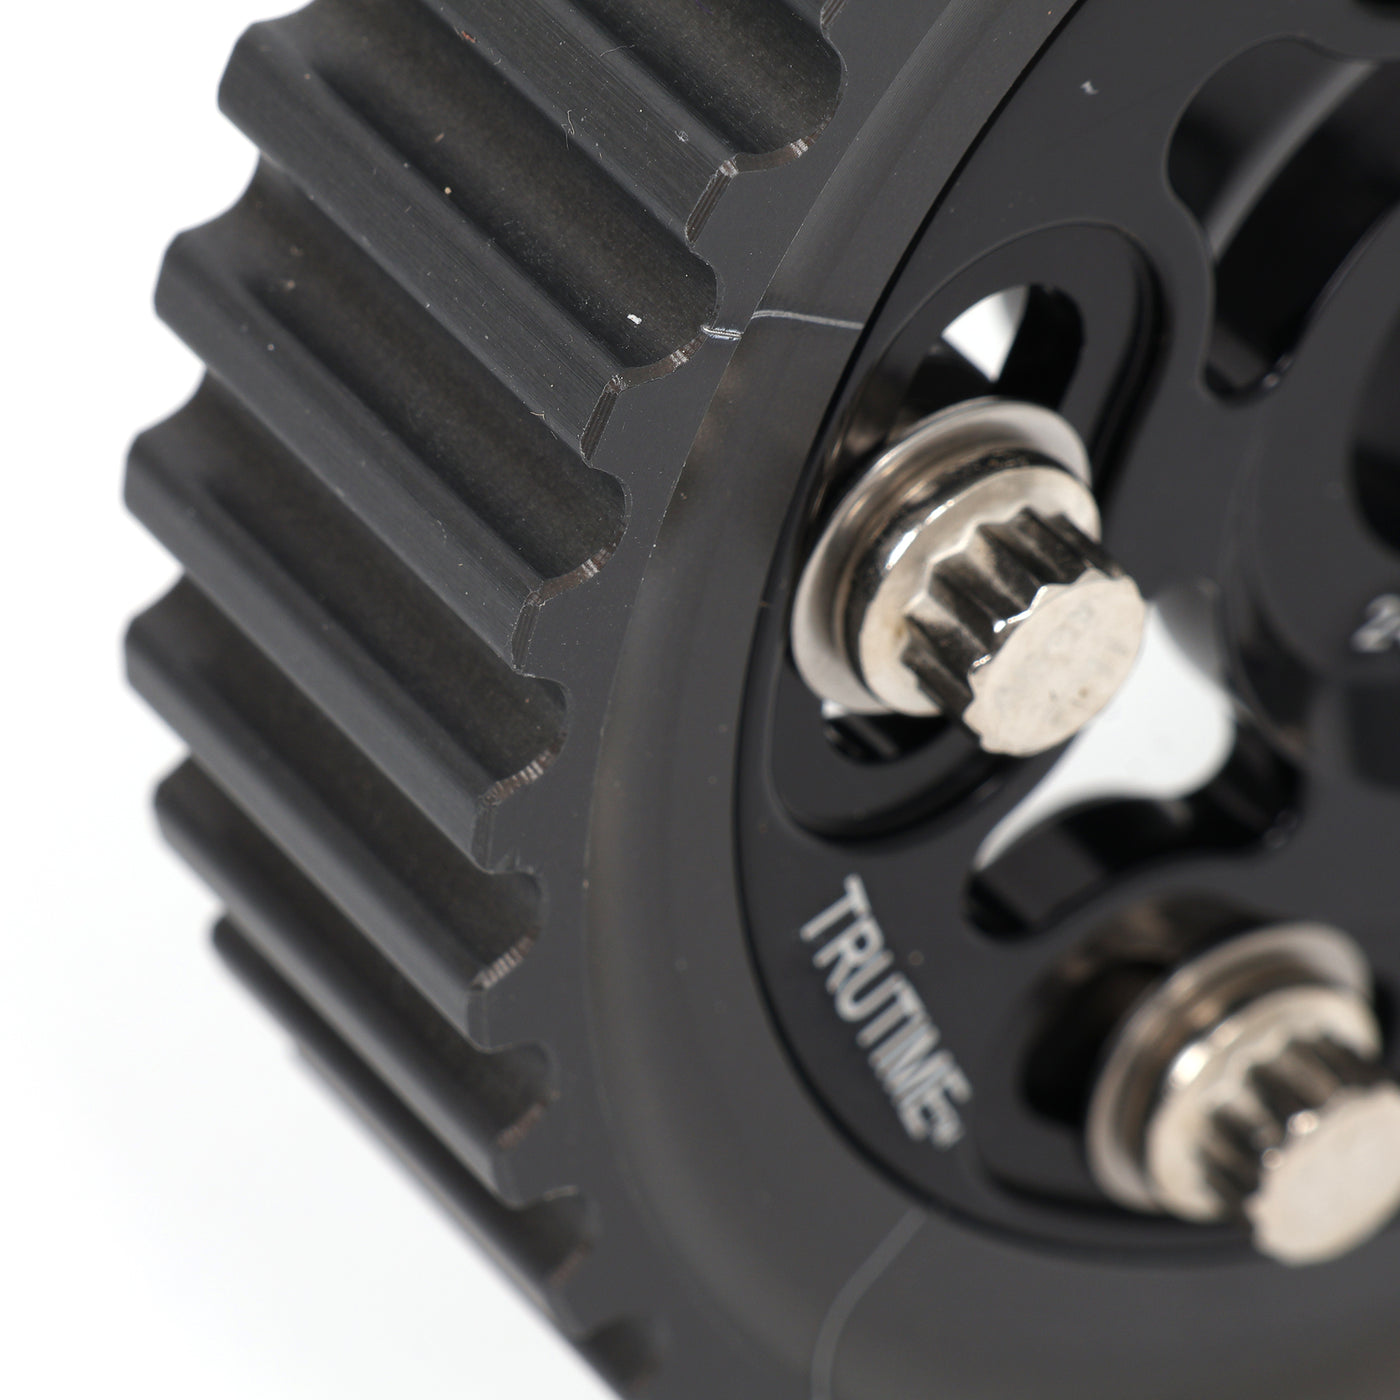
  • AEM Tru-Time Adjustable Cam Gear, D16Y8 Engines

    If you’ve ever bolted a cam into a D16Y8 and thought, why does this thing feel a little off, you already get why an adjustable gear matters. The AEM Tru-Time adjustable cam gear (SKU: AEM-23-804BK) gives you straightforward control of cam timing on 1996 to 2000 Honda Civic EX and 1996 to 1997 Honda Del Sol Si. It’s the AEM cam gear D16Y option a lot of us reach for when the head’s been milled, compression’s up, you’re adding boost, or the cam card and reality just don’t line up.

    You get true one degree changes, plus laser etched marks you can actually trust when you come back for another pull. That means cam gear precision adjustment Civic guys can repeat, not the usual, I think I moved it a little. Move it a degree or two and you can shift the powerband, calm down a peaky setup, or chase a little more up top. This is the adjustable cam gear Honda Civic and adjustable cam gear Del Sol owners use when they want to tune with intent instead of guessing.

    AEM CNC machines the gear from 6061 T6 billet aluminum and hard anodizes it, so it stays light and holds timing where you set it. The teeth are precision cut to help reduce timing belt wear, which matters because chewing belts is a dumb way to ruin a weekend. We run this exact Civic AEM cam gear on our own builds because it makes timing changes quick and repeatable, especially when you’re dialing in a high compression cam gear Civic setup or matching a tune to an aftermarket cam.

    The kit comes with grade 8 six point hex bolts with integral washer flanges and AEM includes recommended starting settings. From there, you do what you always do, verify, log, and adjust. If you want an AEM cam gear Honda Civic and AEM cam gear Del Sol part that does the job without drama, this Tru-Time cam gear Civic setup is it. Call it a Civic cam timing gear, a cam gear Honda Civic D16Y, or a Civic D16Y cam gear, it’s the same point, you get control over where the engine actually makes power.

    Key Features

    • Adjustable cam gear D16Y8 fitment for 1996 to 2000 Honda Civic EX and 1996 to 1997 Honda Del Sol Si
    • True one degree adjustment with laser etched timing marks for repeatable changes
    • CNC machined 6061 T6 billet aluminum construction with hard anodized finish
    • Precision cut teeth help reduce belt wear and keep timing consistent
    • Includes grade 8 six point hex bolts with integral washer flanges
    • Works well for milled heads, aftermarket cams, boosted setups, and high compression combinations
    • Easy, repeatable tuning for midrange shaping and top end tweaks
    • AEM Tru-Time cam gear Civic option for enthusiasts who want adjustment without guesswork
  • 1996-2000 Honda Civic EX
    1996-1997 Honda Del Sol Si
  • CNC-machined from 6061-T6 billet aluminum
    Hard anodized belt surface
    True laser-etched markings
    Grade-8 six-point hex bolts with integral washer flange
  • (1) Cam Gear
  • Install the cam gear using the provided grade-8 hex bolts. Adjust the cam timing in one-degree increments using the laser-etched markings. Follow the recommended cam gear settings included in the package.
Shipping Notes
  • Free Standard Shipping on $100+ Orders to the USA.
  • Except Preorder products are shipped in 48 hours.
  • Delivery to the USA:
  1. Standard Shipping : 3-10 business days
  • If time is of the essence, please consider selecting expedited delivery for faster service.
Exchange/Return Notes
  • We offer a 30-day return/exchange service after receiving.
  • Final sale items are not eligible for returns or exchanges.
  • To process your return/exchange, please contact us at [email protected]
  • Please click here for more details>>> Return & Exchange Policy
SKU: 919349428

Discover Niche Categories That Outsell ex gear

Top-Converting Item to Boost Your Average Order

4.7 ★★★★★
Based on 1267 reviews
Sort
Highest Rating
Newest First
Oldest First
Product Reviews
A
Verified Purchase
Alda
Lake Worth, US
★★★★★ 5
Very good product. Great Price!
Color: White Ink Pad 2xin
Very good product. Easy to install. All the installation and reset instructions were clearly detailed. I'll definitely buy again.
WAS THIS REVIEW HELPFUL?YesReportShare
Reviewed in the United States on June 7, 2026
J
Verified Purchase
Jill Thorne
Alexandria, US
★★★★★ 5
Don't have to be a computer whiz to use, simple instructions
Color: White Ink Pad 2xin
I am not a techy person and when I got the message that my ink pad was full, I thought I would have to buy a new printer. I have a small craft business, and my printers are ESSENTIAL to me. I have never done anything like this before, and it literally took me 2 minutes. I am so excited and relieved that my printer is up and running. The package came with 2 ink pads, detailed instructions, gloves, a waste bag and a screwdriver. Perfect! Just followed the step by step directions and I was done! Yay! Thank you so very much. Saved me so much money and aggravation. Highly recommend.
WAS THIS REVIEW HELPFUL?YesReportShare
Reviewed in the United States on June 10, 2026
N
Verified Purchase
Nicole Reiche
Lexington, US
★★★★★ 5
Good price and good dupe of brand name
Color: White Ink Pad 2xin
Easy to install. Cheaper than buying brand name. Fix perfectly and now I can print again
WAS THIS REVIEW HELPFUL?YesReportShare
Reviewed in the United States on May 15, 2026
D
Verified Purchase
Daniel H. Phillips
San Leandro, US
★★★★★ 5
Small glitches but renews printer to like new.
Color: White Ink Pad 2xin
Makes the printer work like new, the software works well but I had to run the routines several times before the printer actually actually cleared. Now it works like a new printer.
WAS THIS REVIEW HELPFUL?YesReportShare
Reviewed in the United States on May 6, 2026
D
Verified Purchase
Dave
Natrona Heights, US
★★★★★ 1
Really want an Epson Printer?
Color: White Ink Pad 2xin
Buyers get prepared for hours of frustration if have an Epson Ecotank printer because this seller does not tell you what's ahead when buying this product. One's instructions are vague and come with hours of frustration. Forget those U-tube videos they too only want to make small talk, you either buy this product and put up with hair-pulling software, or go directly to Epson and buy direct either way this will make you not want to buy another Epson product. Change out the Ink Pad reservoir in the back of printer at corner behind the ink tank. Will need a small Phillips-head driver (this kit comes with driver) to remove cover, once cover removed remove the ink pad attachment screw, save those screws for reinstalling new ink pad. Now comes the fun part resetting that E-11 Error shown on printer screen. Until this is resolve you will not be able to print anything. Before you get started with the given weblink nothing will not work until you turn off the Wi-Fi and connect printer to computer via USB cable; and, most printers do not come with that cable must buy on Amazon separately (under $5.00). Once cable connected check to make sure have a good connection from the Device Manager. Now clear out all pending print jobs. Then download the weblink shown in the instructions; do not even mess with that Driver and Utility Combo Pack (why instructions shows that who knows why...) just download www.wicrestpro.com then follow instructions; and, if you get a communications error you did not follow these steps in order. When you see Epson Adjustment Program click on the Port you will see selections (Auto Select and multiple printers locate your printer and click on that printer then click OK. Next screen click on Waste Ink pad counter, and make sure on next screen you don't go snooping around, just check all 3 boxes and click Initialize then here is when WTF may or not occur. When the OK button is clicked, counter will be initialized, and you click OK. If you get a Communication Error don't panic go back into your computer setting make sure Firewall for printer is off, Wi-Fi is off, Virus Protector is off, and remove "all pending print jobs" then make sure printer to USB cable is connected firmly. Then go back through same process most likely you will not get Communications error again, but a message reading turn off the printer then after turning off click ok, wait count to 20 then turn printer back on, install paper then click print test page. That's it you have now successfully installed the Ink Pad Counter.
WAS THIS REVIEW HELPFUL?YesReportShare
Reviewed in the United States on April 1, 2026

recommand products