Shipping Estimate
USA
- USA
- CAN
- USA
- CAN
Ships within 48 hours · Estimated delivery Jul 7 - Jul 12
For Your Every Summer RSVP, with Code: SUMMER15
Description
spider lily life cycle Red Spider Lily (Lycoris radiata) Southern Heirloom TriploidRed Spider Lily (Lycoris radiata): A Gardener's Guide to the Enchanting Resurrection Flower Red spider lilies are beloved perennials that thrive in zones 7 10, bringing a burst of vibrant beauty to gardens when fall rains arrive. A Lily of Many Names: The Red Spider Lily's Regional Nickname: One of our favorite things about the red spider is its many names as you travel across the country. This also makes for interesting conversations with our
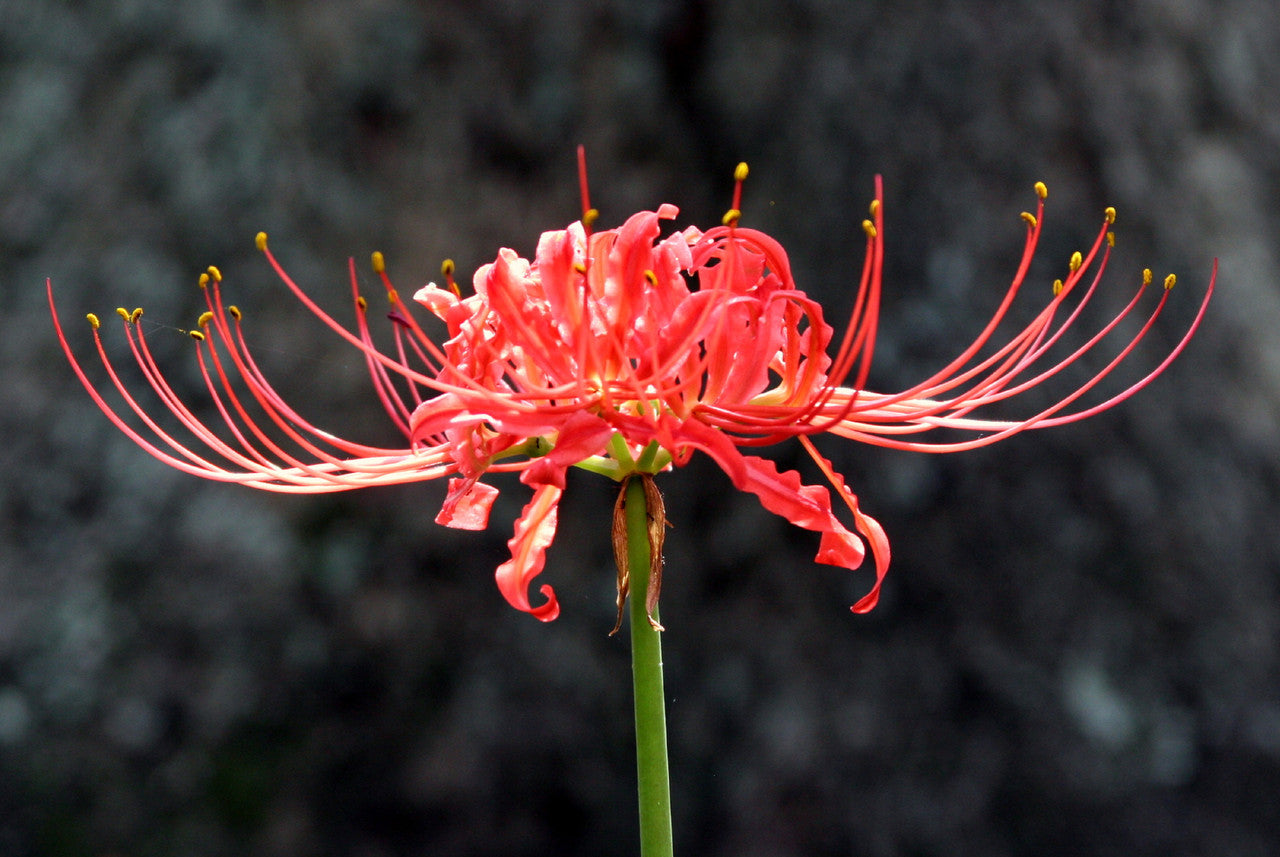
Red Spider Lily (Lycoris radiata): A Gardener's Guide to the Enchanting Resurrection Flower
Red spider lilies are beloved perennials that thrive in zones 7-10, bringing a burst of vibrant beauty to gardens when fall rains arrive.
A Lily of Many Names: The Red Spider Lily's Regional Nickname:
One of our favorite things about the red spider is its many names as you travel across the country. This also makes for interesting conversations with our customers to make sure that we are talking about the same flowering bulb. The names don't change the striking beauty of this fall-blooming flower. Here in East Texas, we call it the "red spider lily". It is red, and the stamens look like spider legs. Along the coast, it is often referred to as a "hurricane lily" because it often blooms after the first fall hurricane. Many people call this a "naked lady" because it blooms on a naked stalk. Others simply call it a "surprise" lily because it shows up out of nowhere and surprises you one day with a flower. No matter what it is called, its beauty will make you glad that you have it in your garden.
The Red Spider Lily's Unique Bloom Cycle: A Timeline
Understanding the Red Spider Lily's bloom cycle is key to successful cultivation. Most people still expect to see something growing during the summer months. You won't see anything. These lilies are dormant in the summer. The flowers suddenly appear with the first later summer or early fall rains. One day there is nothing growing and then suddenly you have a surprise, a fully blooming flower! That is why they are called "Surprise lilies". Yellow spider lilies act very similarly to yellow spider lilies, schoolhouse lilies, and naked ladies. Simply put, they bloom in the fall and then have foliage for the winter. I have spider lilies planted almost 2 years ago that have not yet produced blooms but have produced increasing foliage each year.
1. Planting (Anytime): Avoid hard freezes, but otherwise you can plant the bulbs anytime that you are thinking about them.
2. Dormancy (Summer): Bulbs rest underground, conserving energy.
3. Surprise Blooms (Late Summer/Early Fall): Flowers emerge seemingly overnight.
4. Foliage Growth (Fall/Winter): Leaves appear, gathering nutrients for the following year.
Nurturing the Foliage: The Key to Red Spider Lily Success
The foliage is vital for the bulb's health and reproduction. Don't be discouraged if you don't see blooms the first year – healthy foliage is a positive sign of bulb establishment. The foliage tells you the bulb is growing and multiplying. We know that we all want to see the beautiful unusual blooms in the fall, but the foliage is very important. The foliage is what allows the bulb to grow and multiply. Many people get very concerned if they don't see the spider lily bloom the first year that they plant it and believe that maybe the bulb isn't any good. The foliage is what you watch for if you don't see your spider lily bloom, or even if you do.
Below you will see a picture of the foliage of the red spider lily - it looks like grass. We took the picture on November 1st. The foliage has been popping out of the ground a little over the previous couple of weeks, but now you can really see the stand. All of those different tufts of foliage are bulbs, and someday you will see a beautiful stand of red spider lilies here. In this area because of the super dry summer, not one red spider lily bloomed. However, you can see that the bulbs are growing. The foliage is up and ready to take in nutrients over the next several months while helping the bulbs grow, mature, and multiply. I know you will have to take our word for it, but there wasn't even 1/2 that much foliage there last year which shows you how quickly the bulbs multiply. The foliage will continue to grow. Even if it gets hit by a winter cold snap, it will have taken in nutrients for months! Always allow the foliage to die down naturally and don't cut it off. If you cut it, you are killing the bulb. Once the foliage is completely dead which is usually around the beginning of May, this area can be mowed. Remember, it takes a lot of energy for the bulb to push that bloom up out of the ground and open wide. The more time the bulbs can take in nutrients, the more energy they will have for that fall bloom.
Sunlight Requirements: Ensuring a Spectacular Bloom
The single most important thing about landscaping with spider lilies is the sun. They need at least 6+ hours a day of WINTER sun. That means about 6-8 hours of sunlight during the winter months. If you look at the photo above, you will see that they are in the shade of the trees. You can be sure that most, if not all, of those trees, will lose their leaves in the winter when the greenery needs sunlight. The spider lily puts on its foliage during the winter (November - May) and that is when it takes in the nutrients it needs to produce those golden flowers the following September. The winter foliage soaks up sun energy during winter as it prepares for summer dormancy. The foliage normally completely dies down by around May.
Planting and Care Tips for Red Spider Lilies
Don't plant the bulb too deep. You will plant the bulbs 2-3 times deep the height of the bulb (so if your bulb is 2" tall, then you will plant it 4-5 inches deep). You can plant 2-3 per hole to make the blooms look more natural. Spider lilies really do well in any type of soil. They thrive in soil that has plenty of organic material mixed in, but they do not require fertilizer. Newly planted bulbs would actually be harmed by exposure to fertilizer, so if you are going to apply nutrients, limit the application to established plants when the plants are producing their green leafy foliage during the winter. After planting the bulbs, water the soil thoroughly. Damp soil is ok, as long as the bulbs are in a spot where they will receive plenty of winter sun and the foliage is allowed to die down naturally in the spring. Standing water is not good. Once the summer season starts the spider lily will do best in soil that dries out a bit, as this facilitates its entry into the dormant stage when its leaves die back. This period is followed by its blooming season when it will reward daily watering with long-lasting blooms. Too much moisture in the soil will lead to the bulbs rotting.
Planting Depth: Plant bulbs 2-3 times their height deep.
Soil Type: While adaptable, they thrive in soil rich in organic matter.
Watering: Water thoroughly after planting and during dry periods. The bulbs are dormant during the summer so you don't need to water them.
Fertilizer: Avoid fertilizing newly planted bulbs; established plants benefit from fertilizer during active foliage growth.
The performance of red spider lilies primarily hinges on two factors:
1. Winter Sunlight: To produce lush blooms, the bulbs need to absorb sufficient nutrients from the winter sun. Energy stored over months is used to create these breathtaking blossoms. For this, they require at least six hours of winter sun for several months to ensure they have the energy needed.
2. Fall Rains: The magic trigger for these blooms is the arrival of fall rains. Without adequate rainfall in September, the bulbs won't bloom, as the rains are the signal they've been waiting for.
Dividing and Multiplying Your Red Spider Lily Garden
Early spring is ideal for dividing, but it can be done whenever convenient. Remember, transplanting might cause the lilies to skip a blooming cycle.
Companion Plants for Red Spider Lilies: A Symphony of Color
Enhance your garden's beauty by pairing Red Spider Lilies with other perennials, annuals, or bulbs for continuous blooms:
Perennials: Salvias, Lantanas, Plumbago, Phlox
Annuals: Alyssum, Snapdragons, Pansies, Cyclamen
Bulbs: Narcissus, Iris, Snowflakes, Rain Lilies, Crinums, Hymenocallis
FAQ's
Do animals bother the red spider lilies?
Pollinators adore yellow spider lilies...hummingbirds, bees, and butterfilies.
While deer will eat anything (including plastic flowers if hungry enough), spider lilies are more resistant to their urges than many other ornamental garden products. They definitely leave the foliage alone during the winter, but can be attracted to the bright flowers. So the answer to this question, is that they are mostly resistant, depending on how hungry the deer are. Remember, humans ate tulips during times of hunger/famine, yet tulips definitely aren’t on our menu either.
We understand that online sources sometimes raise concerns about toxicity, so we want to offer some clarification. Much of the alarm you may see online stems from generalized or exaggerated toxicity listings. In reality, cases of actual poisoning are extremely rare, and the plants are not considered a serious risk. While red spider lily bulbs, like many ornamental bulbs, do contain alkaloids that could cause mild irritation if ingested in large quantities, they are not considered dangerous to humans or animals under normal garden conditions. The key is that even for mild irritation they would need to be fully consumed in large quantities. Even if animals chew on the bulbs a little bit, they aren't interested in them (even deer who have been known to eat plastic flowers leave them alone). In fact, they’ve been grown safely in Southern gardens for generations—including in areas with pets and children. You can feel confident they won’t pose a hazard just by being in your garden.
When should I plant red spider lilies? How far in advance should lily bulbs be planted before the first frost in the fall?
For fall planting, aim to have fall lily bulbs in the ground at least four weeks before the first frost. This gives them time to get settled and adjusted before the freeze. You can plant red spider lilies anytime, but avoid a hard freeze.
How do you ship red spider lilies?
During the spring, we ship these vibrant bulbs "in the green," which means they are plump, healthy, and eager to be planted. Expect the foliage to yellow and die back naturally—this is a normal process where the leaves nourish the bulbs for future blooms. Once the foliage is dead, you can cut it off. The rest of the year we ship dormant bulbs. Plant them, water them, and then just wait. Remember - you won't see anything during the summer as the bulbs are dormant. You may not see blooms the first fall depending on when you planted the bulbs. Many perennial bulbs need 6-12 months in the ground before they bloom.
Your Red Spider Lily Journey Starts Today!
Order your Red Spider Lily bulbs now and witness the magic of these captivating flowers in your own garden. With their unique charm and resilience, they are guaranteed to become a treasured part of your landscape.
Shipping Notes
- Free Standard Shipping on $100+ Orders to the USA.
- Except Preorder products are shipped in 48 hours.
- Delivery to the USA:
- Standard Shipping : 3-10 business days
- If time is of the essence, please consider selecting expedited delivery for faster service.
Exchange/Return Notes
- We offer a 30-day return/exchange service after receiving.
- Final sale items are not eligible for returns or exchanges.
- To process your return/exchange, please contact us at [email protected]
- Please click here for more details>>> Return & Exchange Policy